10 Simple Home Upgrades Under $100 (That Look Designer-Approved)
Budget-friendly ideas to refresh your space and when to call in a pro.Small updates can make a big difference in how your home feels. From swapping hardware to layering textiles, there are plenty of budget-friendly upgrades you can tackle for under $100.
But here’s the thing: individual updates only go so far. What truly transforms a space is when those small choices are part of an intentional, cohesive design plan. Working with an interior designer helps your home feel complete and connected, not messy or unfinished.
Here are 10 affordable design upgrades you can try today—plus a look at how a designer can take each one to the next level.
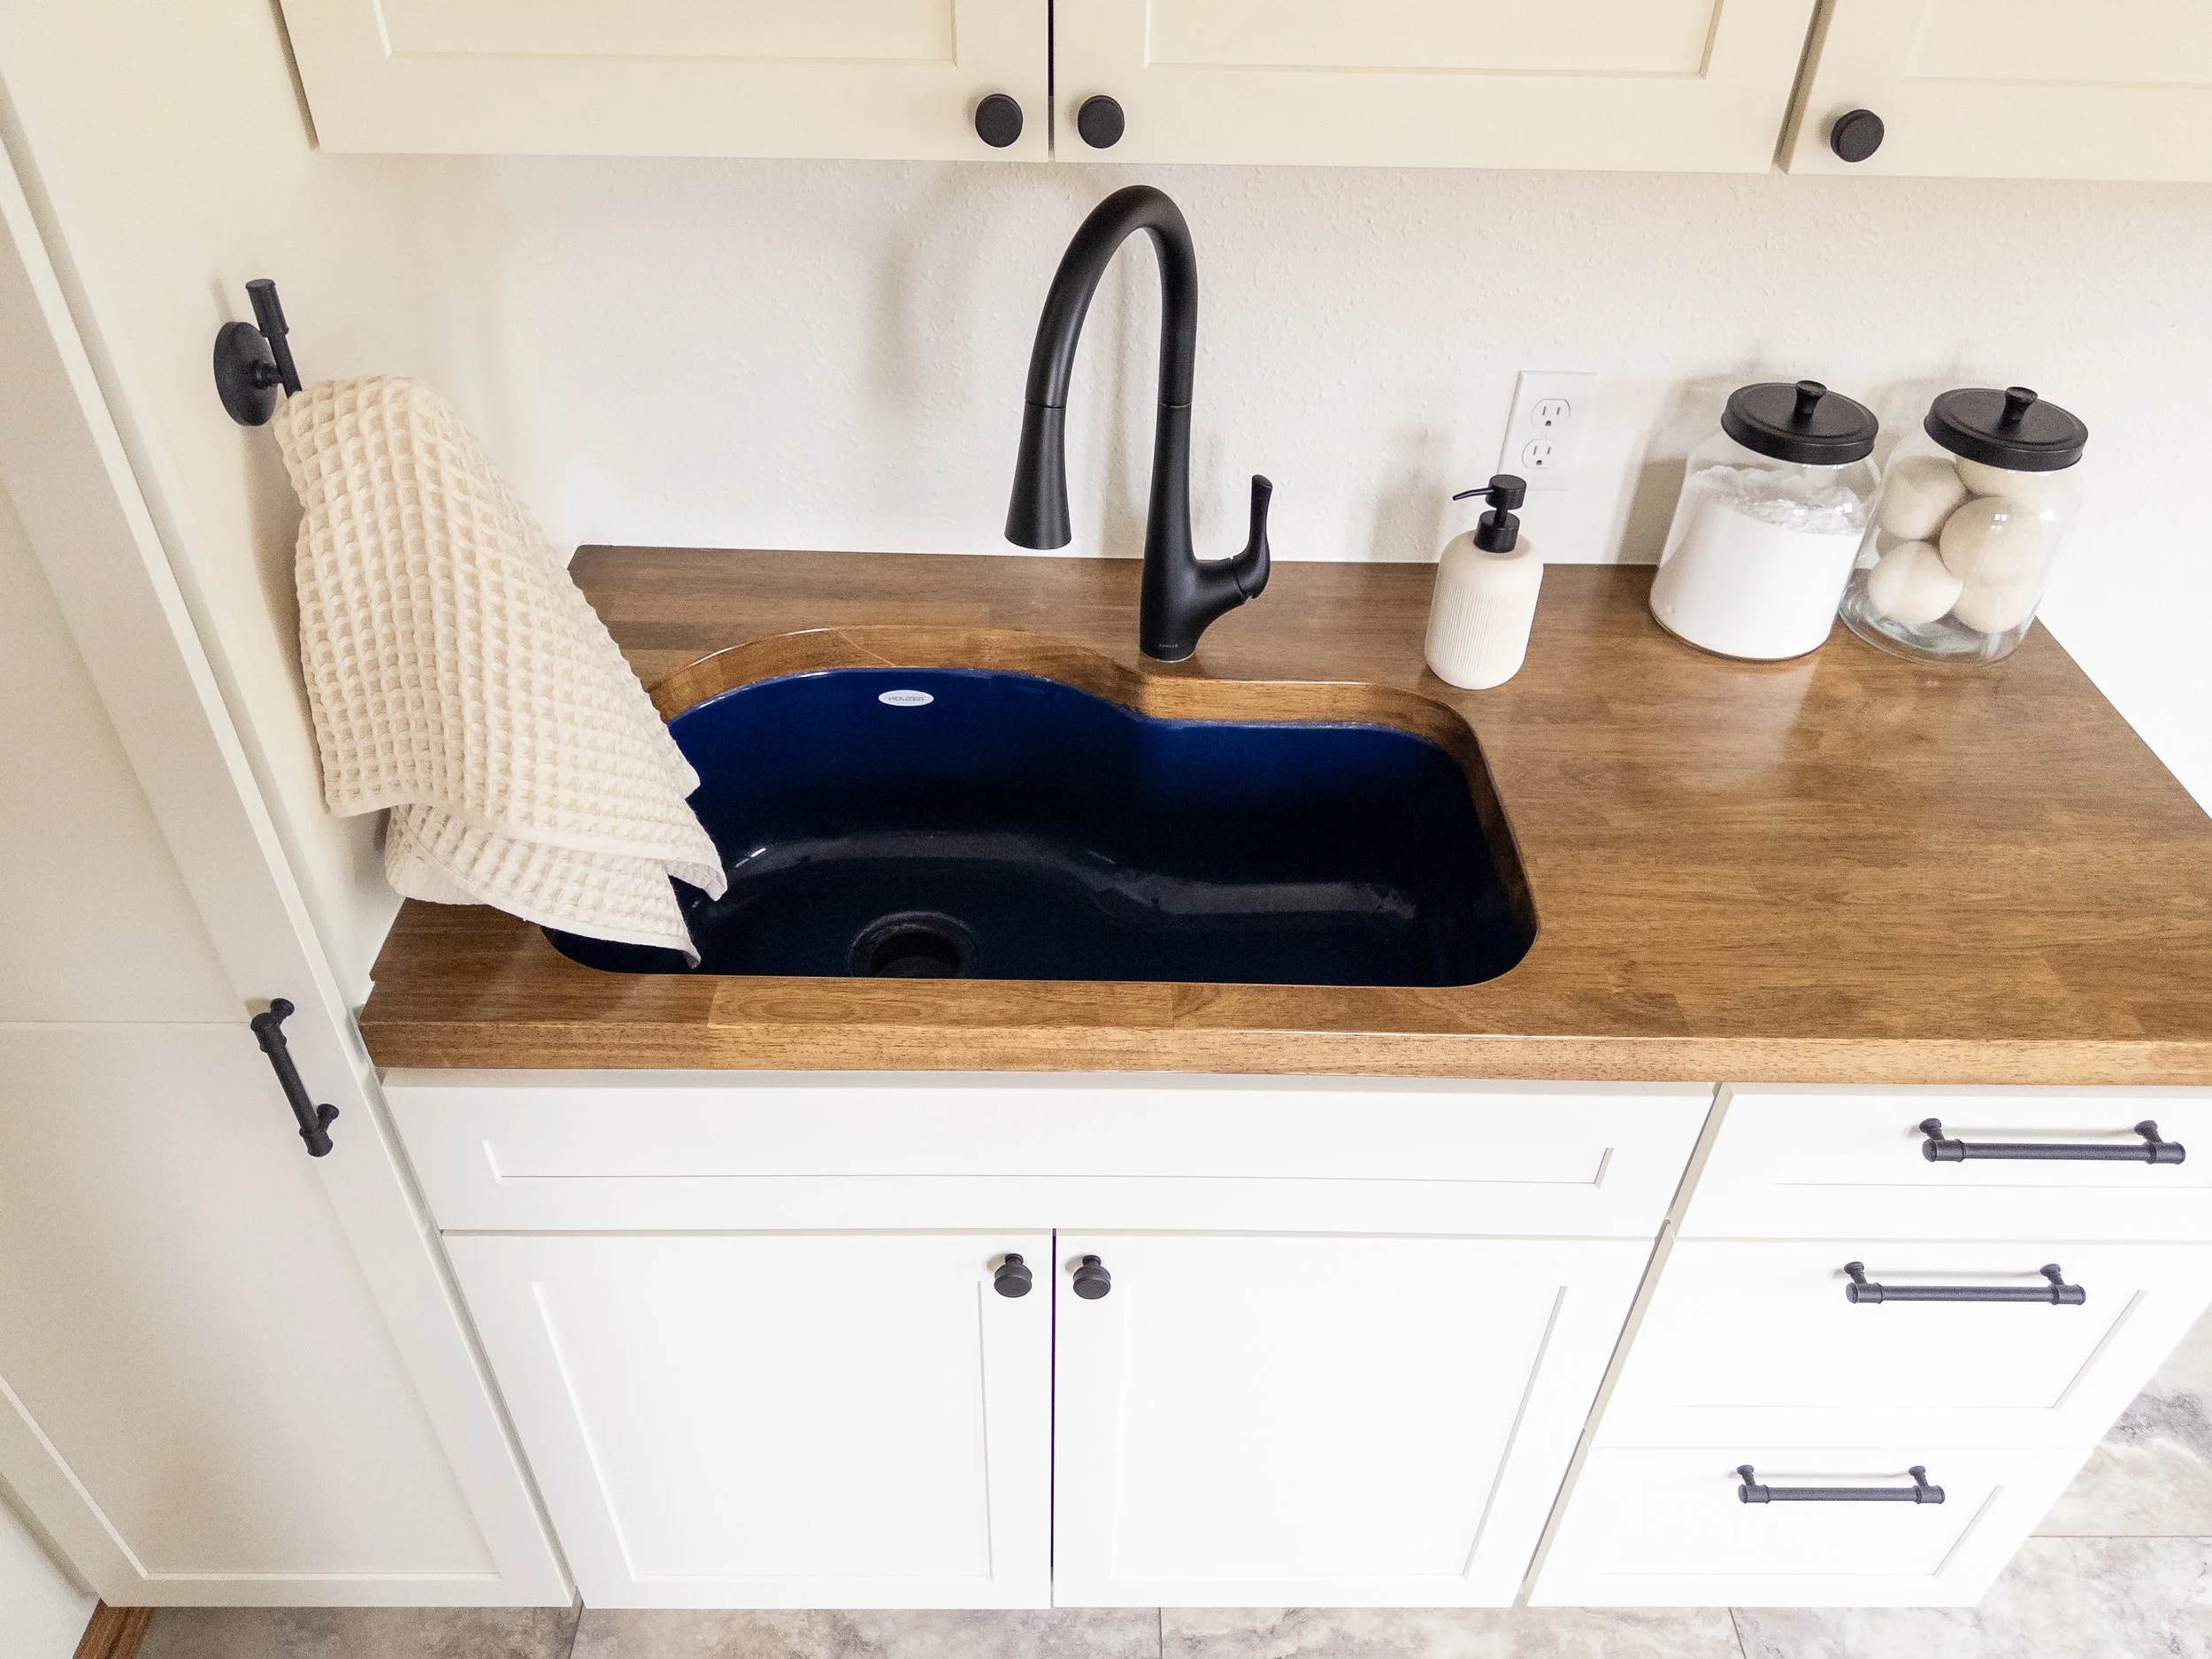
Image Source: Montana Interior Design
1: Swap Out Cabinet Hardware
DIY: Update knobs and pulls in black, brass, or matte nickel for an instant refresh in kitchens or baths. Especially if you’re cabinets never had hardware before.
Designer Take: A designer ensures hardware finishes coordinate seamlessly with faucets, lighting, and door hardware, giving the whole room a polished look.
2: Refresh Your Lighting
DIY: Replace a dated flush mount with a modern pendant or add an affordable lamp.
Designer Take: Designers plan layered lighting (ambient, task, accent) and make sure fixture scale and placement enhance both function and style.
3: Paint a Focal Point
DIY: A quart of paint can transform a door, accent wall, or even an old side table.
Designer Take: A designer creates a whole-home palette that balances undertones, lighting, and finishes—so one bold moves ties into the bigger picture.
4: Upgrade Switch Plates & Outlet Covers
DIY: Swap builder-grade white for matte black, brass, or screwless covers.
Designer Take: We select finishes that integrate with trim, hardware, and fixtures, so even the smallest details feel intentional.
Image Source: Montana Interior Design
5: Add a Statement Rug or Runner
DIY: Layer in a colorful runner in a hallway or kitchen for texture and warmth.
Designer Take: We scale rugs correctly for each space, coordinate patterns with upholstery, and source durable fibers suited to Montana living.
6: Switch Out Pillow Covers
DIY: Seasonal colors and textures from affordable retailers instantly refresh a sofa or bed.
Designer Take: We curate fabrics with depth and quality, layering tones and textures that tell a cohesive story throughout your home.
7: Hang Affordable Art or Frames
DIY: Print vintage Montana maps, family photos ro downloadable art for under $20.
Designer Take: Designers help with scale, framing, and placement—plus sourcing artisan or original works that elevate your home’s authenticity.

Image Source: Pinterest
8: Style a Tray or Surface
DIY: Group candles, books, and a vase on a tray for a simple vignette.
Designer Take: We style with proportion, balance, and layering so surfaces look natural and curated—not cluttered.
9: Add Greenery
DIY: Fresh flowers or a houseplant in a ceramic pot brings life to any room.
Designer Take: Designers pair planters with furnishings, integrate greenery into sightlines, and balance scale—so plants become part of the architecture.
10: Update Bathroom Accessories
DIY: Swap a shower curtain, bath mat, or soap dish for something fresh.
Designer Take: We coordinate these accents with tile, cabinetry, and lighting choices so they feel like part of a larger design scheme.

Image Source: Montana Interior Design
Final Thoughts: Small Changes, Big Picture
DIY upgrades are a fantastic way to give your home fresh energy without blowing your budget. But when you want those changes to feel like a cohesive, designer-approved home, it helps to have professional guidance.
At Montana Interior Design, we specialize in making sure every detail connects, whether you’re swapping hardware or planning a full remodel.
Which of these upgrades would you try first?
Share your ideas in the comments or tag us in your DIY transformations: @MontanaInteriorDesign
Ready to take your upgrades further? - Let’s design a plan together. ↗️
All of your support is amazing, and I am so thankful you are here! I really hope this has helped you with your projects or future ideas. Please follow along for a deeper look into the design industry and what I’ve learned working on my own house projects. Send me projects you are currently working on in the comments below! I love seeing what you are up to.
Happy Styling! Read more posts: